
Authentise welcomes you to try out our newest feature, Prep Workflows! This feature takes the best of our existing Production Workflows and allows you to apply this structure and management to your production preparation and planning activities. Gone are the days of circular discussions spread across multiple platforms, disparate resource reviews and data entry, and distributed production signoffs. Create a prep process that your team can adhere to and let the system manage the coordination and execution.
How it works
Prep Workflows are assigned at the line item level and guide each line item through your processes to direct a part from idea to reality. In Authentise terms, we will be structuring the process for a line item to move from Pending Status to Confirmed Status.
We provide the ability to create a library of standard Prep Tasks for use across your Prep Workflows. After creating a Prep Workflow it is as simple as assigning it to a Line Item and clicking Start! The system will then guide your planning team through the necessary Tasks to take your Line Item from Pending to Confirmed. After completing each of the planned Tasks, your Line Item will be Confirmed and ready for production scheduling.

Creating your Prep Workflow
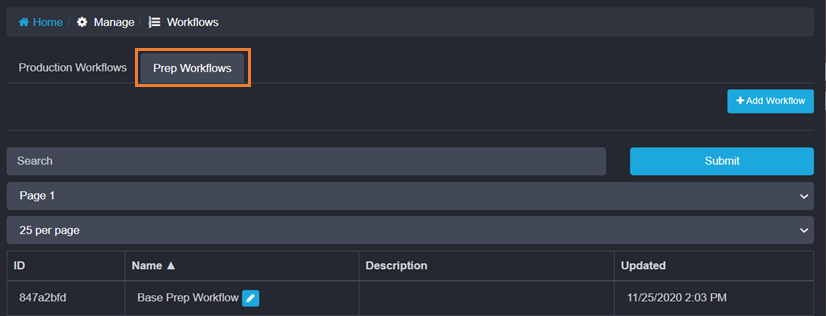
We have added a new Prep Workflow section to the existing Workflows page. Here you can create and update your Prep Workflows. When creating a Prep Workflow, you will add each Prep Task which must be completed before a Line Item is ready for production.

Creating a Prep Task
Creating a Prep Task is easily completed while creating a Prep Workflow. If you have already created the task you are looking for, just select it from the dropdown list and add it to the Workflow. If you need to create a new Prep Task for use in this and future workflows, simply click the + Button while the dropdown says Add Task and you will be able to enter the relevant details within the same window. We aim to make this interaction as simple as possible!
Field Breakdown
Name: Used to describe the Prep Task. Full name and unique across all Prep Tasks in the system.
Short Name: Used to describe the Prep Task when space is limited on the screen. Also unique across all Prep Tasks in the system.
User Group (All is the default option): Only members of this Group can edit this Prep Task.
Estimated Time (Hours): The time you expect the task to be in progress, recorded as hours.
Dwell Time (Days): The time you expect the task to be in a station's queue. Specifically, the expected time from entering a Task's Queue until leaving that Queue (either completed or skipped)
Description: Used to describe or request the specific Task that is being performed. This Description is visible within individual Prep Tasks and can be used to communicate what needs to be done to complete a given Prep Task.

Creating a User Group
Creating and administering your User Groups can be performed by Manager users and is accessed via the Administration Panel's Groups option. Groups consist of a unique name and then whichever users that you choose to add to the group.


Assigning and Working a Prep Workflow
Assigning a Prep Workflow is as easy as updating a line item. Each line item will now have a Prep Workflows section at the top of the line item box. This is where you will set and start the appropriate Prep Workflow. You will also be able to preview the tasks in the workflow before clicking start. After Starting your Prep Workflow, you will need to complete the workflow to move the associated Line Item to Confirmed.
Lock for all... You may also choose to lock a single Line Item's prep workflow for all of the contents of an Order. This is generally used if your operations evaluate the contents of an order holistically rather than individually. To use this option, you must check the Lock for all... checkbox when starting the first Prep Workflow within a given order. After starting the first Prep Workflow in the order, all current and future line items will be locked to the selected prep workflow. Note: this choice cannot be changed once selected and the associated workflow is started. Within the same order, you cannot mix individually completed prep workflows AND the Lock for all.. option. All line items must have prep workflows completed separately OR all must be completed together using Lock for all...

Once started, you may click a dot to see the details of the actual Prep Task. This will include a description of the task, expected and actual timing information and will allow you to record the current status of the work being completed for that task. Note: Only users within the assigned User Group or Bureau Managers can change the status of a specific Prep Task.
The progress dots will also change color according to the status of their related task.


Editing a Prep Workflow
After starting your Prep Workflow, you are able to make changes to it to accommodate process changes, one-off additions, or whatever other reason that the plan has gone a little awry. We allow you to change any Task which has not yet started, which is another way of saying tasks that have a status of New are able to be reordered or removed and we allow you to add additional tasks, as needed. Previously started or completed tasks are not removable and we recommend "Skipping" if for some reason a task is No longer applicable but cannot be removed.

Working your Prep Tasks
Prep Tasks can be viewed and worked through the Line Item section of the Order Summary or via the Tasks list view (accessed via the Work section of the Navigation bar).

In the Task list view, you can use the filters to assist you in your task management and execution processes. This allows you to manage tasks as a Queue for a given Task, User Group, or Prep Workflow! After selecting your task, simply update the status to reflect the progress made on a task.

Task Results in your Traceability Reports
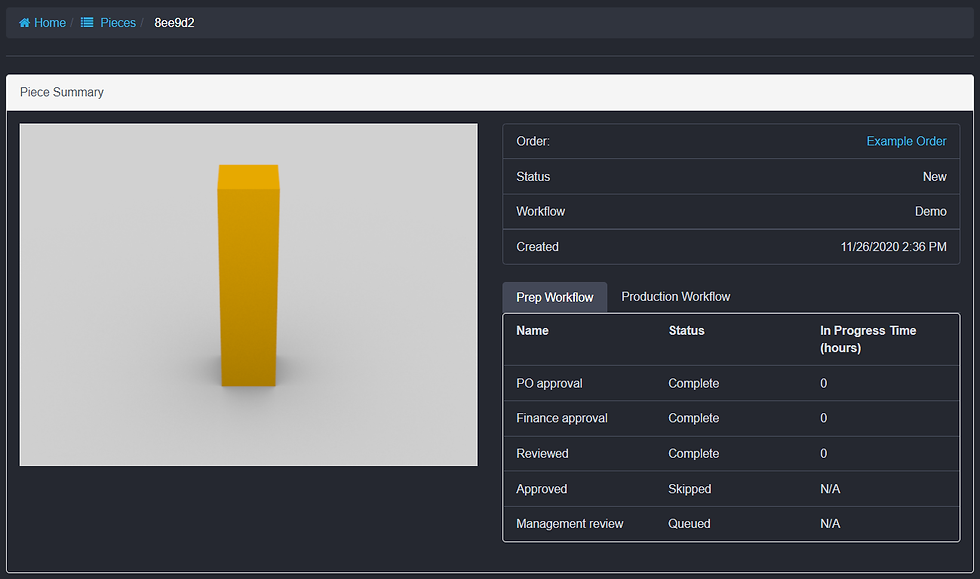
You can find a summary of your Prep Workflow Tasks within your Piece Traceability Report. You will find a familiar grid listing each task, the task's status, and the time to complete the task.
Custom Task Reporting via MS Power Automate
We have also created a new reporting endpoint for use with this feature. This endpoint can be found at /flat-summary-line-item-tasks/ and is modeled closely after our existing /flat-piece/ reporting endpoint. As always, these reporting endpoints are accessible via Microsoft Power Automate, Microsoft PowerBI, Microsoft Excel (using Power Query), or via your custom API integrations. We are excited to hear about how you use this newly created and shared dataset!
Comments